For those of you who don’t know (I sure didn’t!) Appa is the much loved Sky Bison, a character from the anime series “Avatar: The Last Airbender”.
A friend of mine asked me to make a crocheted Appa as a surprise for her husband, so I thought I would share the crochet Appa pattern with you. He’s a really sweet little guy and I must say that I was a little sad to hand him over to my friend as I’d become quite fond of him!
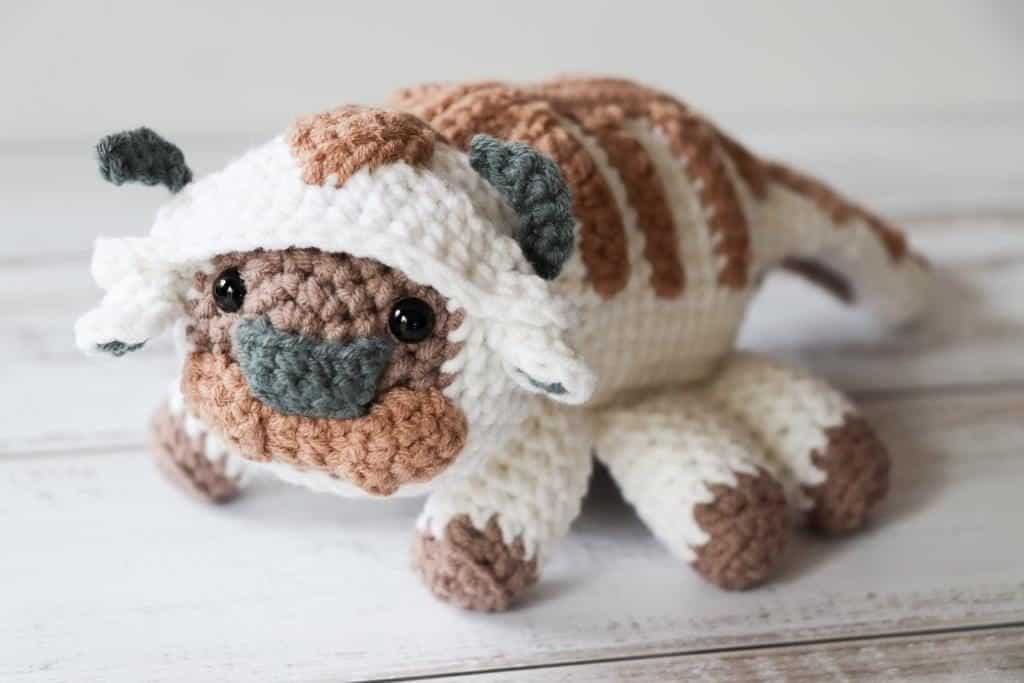
Crochet Appa pattern
Requirements:
- Double knit/ light worsted yarn in white (body)
- Double knit/light worsted yarn in dark grey (ears, nose and horns)
- Double knit/ light worsted yarn in dark brown (face, tummy strip, feet)
- Double knit / light worsted yarn in tan (cheeks, back stripe and arrow)
- Safety eyes (size 7 mm)
- Stuffing
- Yarn needle
- Pins
- 3.75 mm crochet hook
Notes
Finished size: 27cm long, 10cm tall
For crochet abbreviations, click here
Parts of this pattern are worked in continuous rounds. Do not slip stitch to close a round unless otherwise instructed. For more tips on crocheting amigurumi and soft toys, look here
>> PIN NOW, MAKE LATER <<
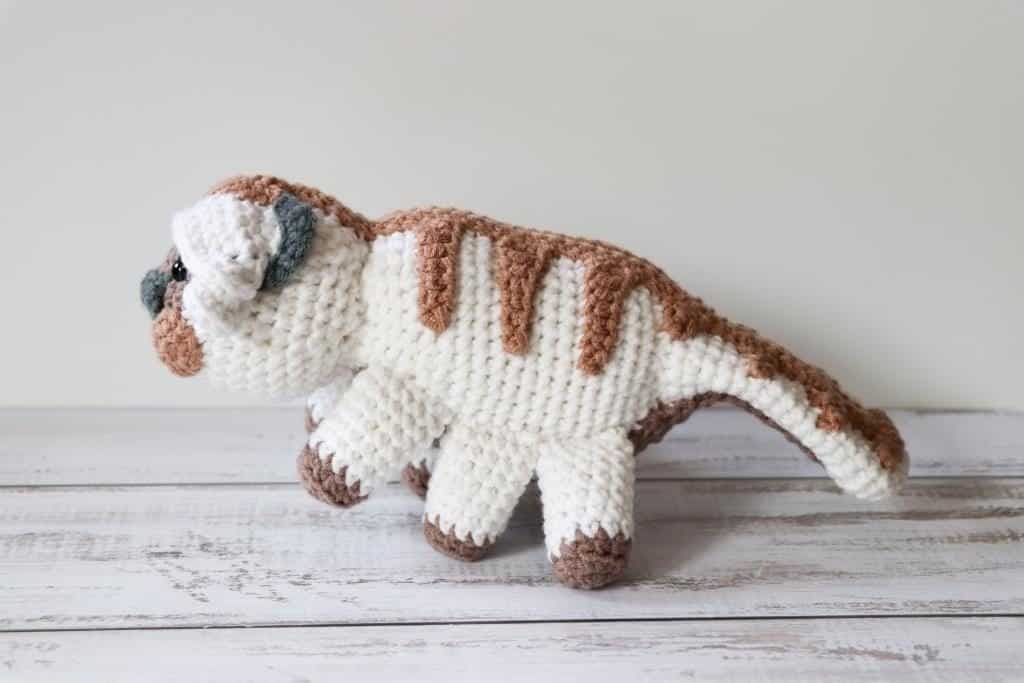
Body (white)
Rnd 1. Mr 6 sc (6)
Rnd 2. 2 sc in each (12)
Rnd 3. [sc in next st, 2 sc in next st] repeat around (18)
Rnd 4. [sc in next 2 sts, 2 sc in next] repeat around (24)
Rnd 5. [sc in next 3 sts, 2 sc in next] repeat around (30)
Rnd 6. [sc in next 4 sts, 2 sc in next] repeat around (36)
Rnd 7 – 16. sc around (36)
Rnd 17. [sc in next 3 sts, 2 sc in next st, 2 sc in next st, 2 sc in next st] repeat once more, sc to end of rnd (42)
Rnd 18. sc around (42)
Rnd 19. sc in next 22 sts, sc2tog, sc2tog, sc2tog, sc 8, sc2tog, sc2tog, sc2tog (36)
Rnd 20. [sc in next 4 sts, sc2tog] repeat around (30)
Rnd 21. [sc in next 3 sts, sc2tog] repeat around (24)
Rnd 22 – 23. sc around (24)
Rnd 24. [sc in next 2 sts, sc2tog] repeat around (18)
Sl st and bind off, stuff
Tail (white)
Rnd 1. Mr 9 sc (9)
Rnd 2. 2 sc in ea (18)
Rnd 3. [sc in next 8 sts, 3 sc in next st] repeat (22)
Rnd 4. [sc in next 10 sts, 2 sc in next] repeat (24)
Rnd 5 – 6. sc around (24)
Rnd 7. [sc in next 10 sts, sc2tog] (22)
Rnd 8 – 18. sc around (22)
Rnd 19. [sc in next 10 sts, 2 sc in next] repeat (24)
Rnd 20. sc around (24)
Sl st and bind off
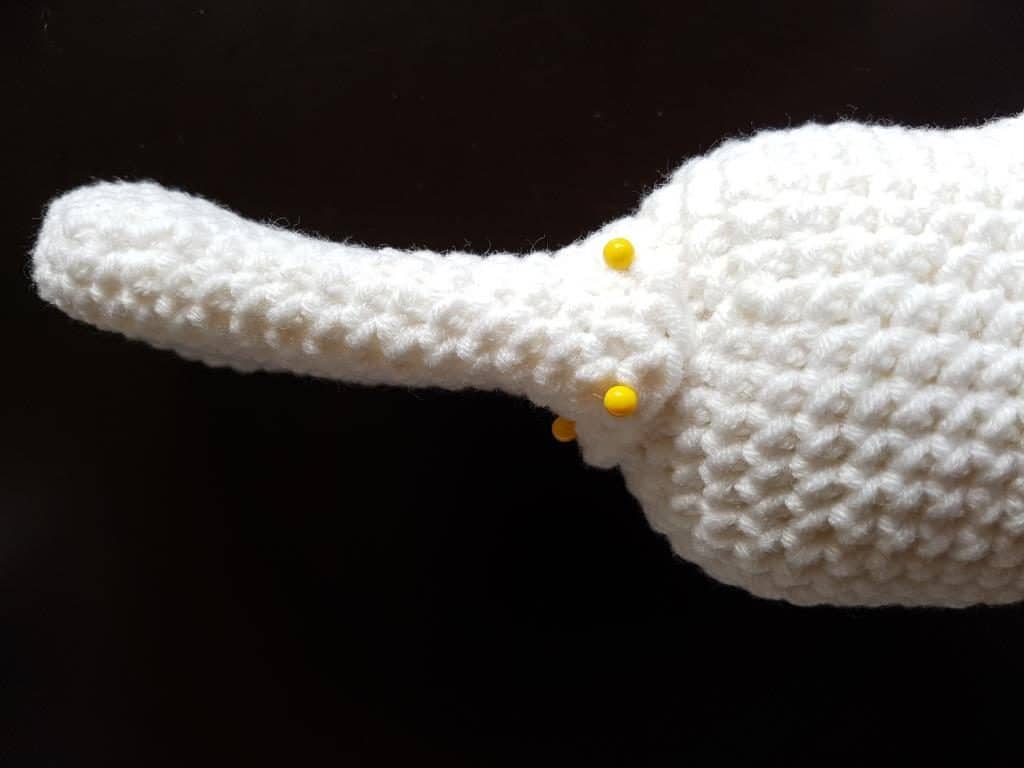
Attach the tail to the closed end of the body (make sure the body is the right way around with the hump at the top!). When you attach it, open the base slightly so that the fit is snug.
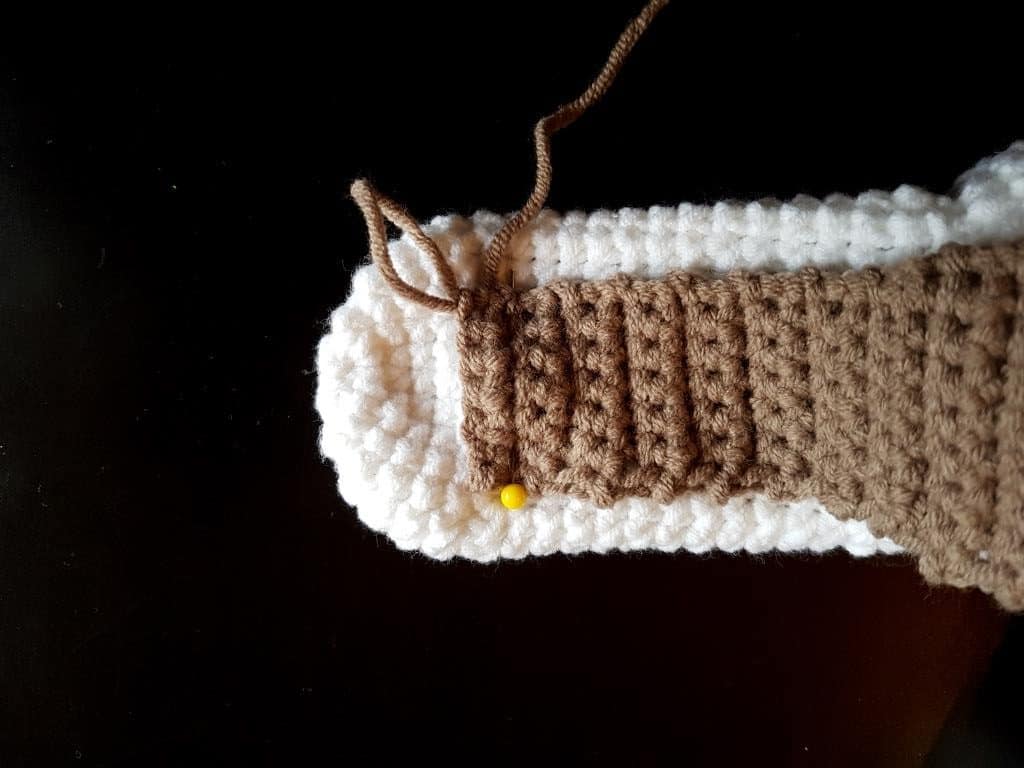
Underbelly strip (brown)
This strip is worked to fit the full length of Appa’s underbelly, from his neck right down to his tail.
R1. ch 7, sc into 2nd ch from hook, sc in remaining sts (6)
R2. ch 1, turn, 2 sc in next st, sc in next 4 sts, 2 sc in last st (8)
R3. ch 1, turn, sc across (8)
Repeat step 3 (sc 8 sts) until the strip is long enough to reach from Appa’s neck to where his tail joins onto his body. Finish off the tail by doing the following:
R4. ch 1, sc2tog, sc 4, sc 2 tog (6)
R5. ch 1, sc across (6)
Repeat step 5 (sc 6 sts) until the underbelly strip covers all but the last 2cm of tail, then;
R6. ch 1, sc2tog, sc 2, sc2tog (4)
R7. ch1, turn, sc2tog, sc2tog (2)
Bind off, leaving a long tail for joining. Stitch the underbelly strip into place
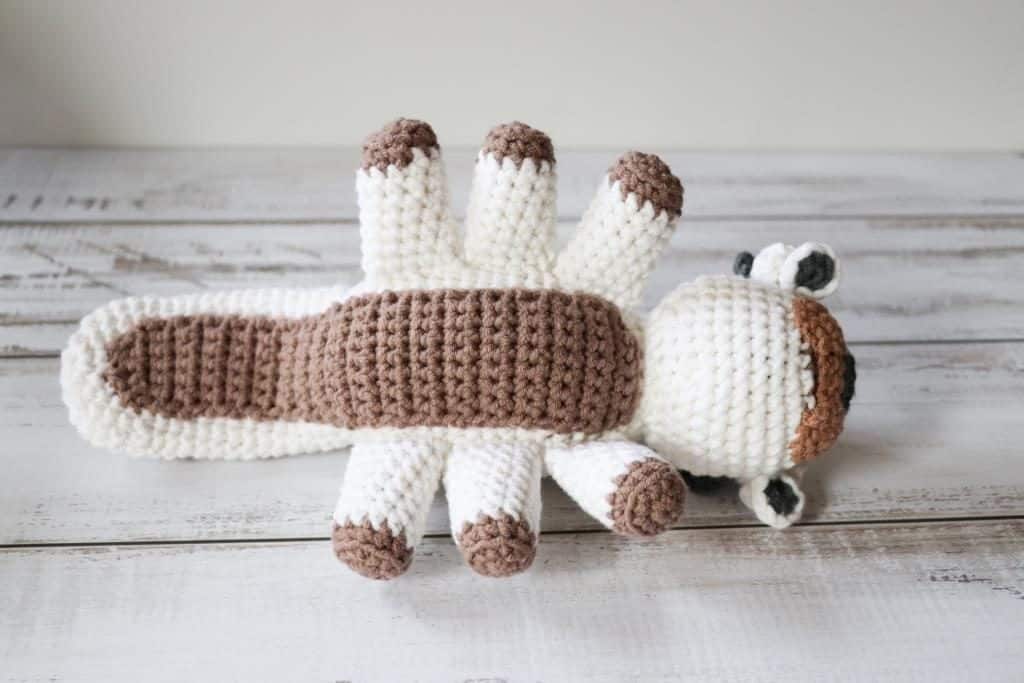
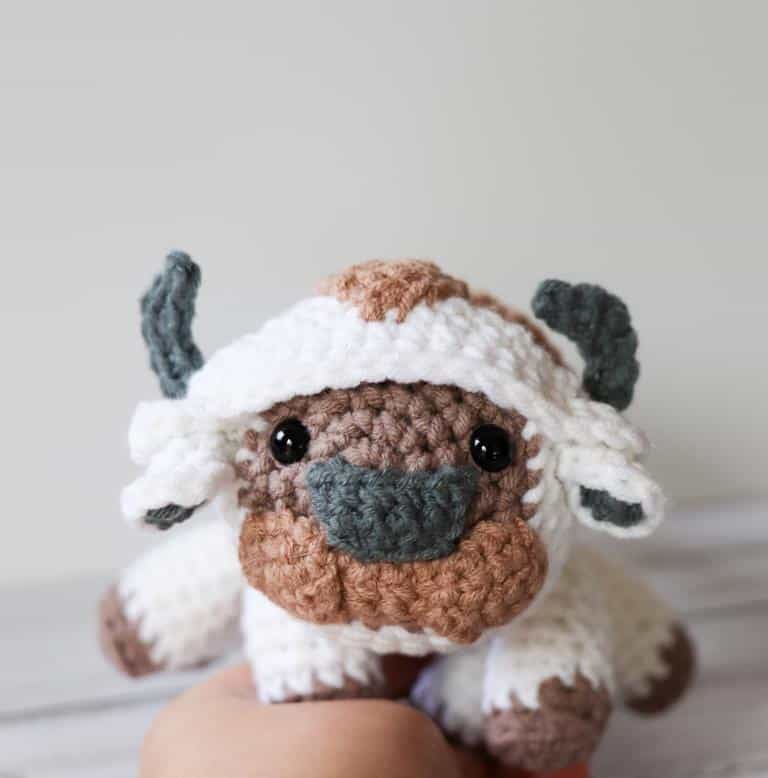
Head (brown + white)
Rnd 1. In brown, mr 6 sc (6)
Rnd 2. 2 sc in ea (12)
Rnd 3. [sc in next st, 2 sc in next] repeat around (18)
Rnd 4. [sc in next 2 sts, 2 sc in next] repeat around (24)
Rnd 5. [sc in next 3 sts, 2 sc in next] repeat around (30)
Rnd 6. [sc in next 4 sts, 2 sc next] repeat around (36)
Change to white
Rnd 7 – 12. sc around (36)
Rnd 13. [sc in next 4 sts, sc2tog] repeat around (30)
Rnd 14. [sc in next 3 sts, sc2tog] repeat around (24)
Rnd 15. [sc in next 2 sts, sc2tog] repeat around (18)
Sl st and bind off. Add safety eyes between round 4 and 5, approximately 5 stitches apart. Stuff.
Nose (dark grey)
R1. ch 4, sk 1 st, sc into next 3 sts, ch 1, turn (3)
R2. 2 sc in next st, sc in next st, 2 sc in next st (5)
R3. ch 1, turn, sc across (5)
Bind off.
Attach the nose to the centre of the face, between the eyes
Cheek patches (tan, x 2)
Rnd 1. Mr 5 sc (5)
Rnd 2. 2 sc in ea (10)
sl st and bind off, leave a tail for joining
Bar to join the cheek patches
R1. ch 8, sk 1, sc across
R2. ch 1, sc across
Bind off.
First attach the bar below the nose, then attach the cheek patches on either side of the bar.
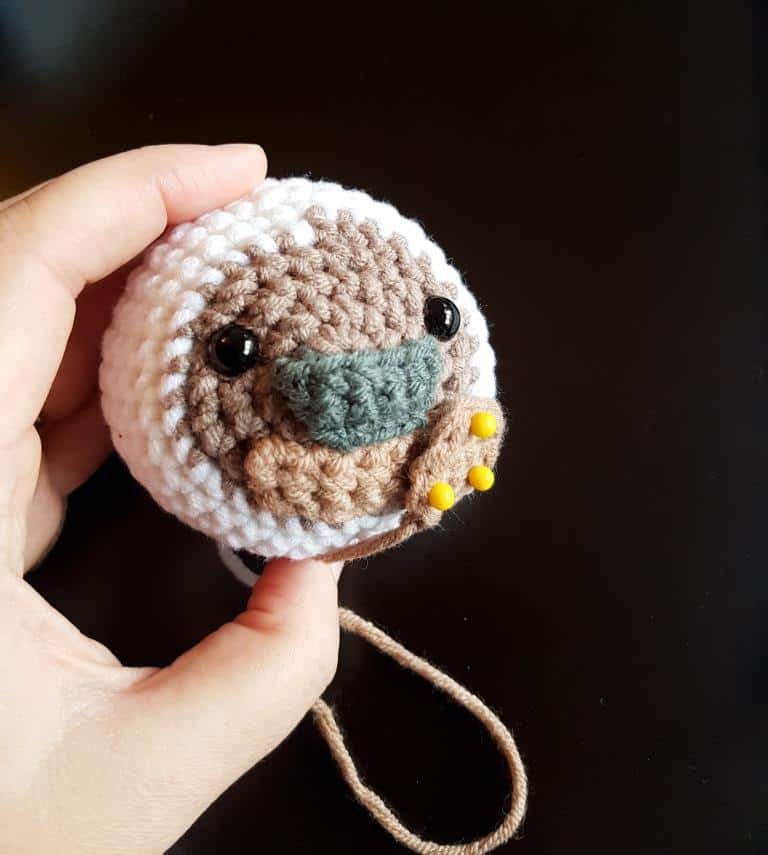
Ears (dark grey and white, x 2)
Rnd 1. In white, mr 6 sc (6)
Rnd 2. 2 sc in each (12)
Sl st and bind off
Rnd 1. In grey, mr 7 sc, sl st and bind off
Place a grey and white circle together, wrong sides facing and stitch around. Fold the ear in half (with the grey in the centre) and do a few whip stitches at one end to create the ear shape.
Horns (dark grey, x 2)
ch 8, sl st into 2 ch from hook, sc into next st, [*2 sc into next st*, repeat 2 more times], sc in next st, sl st into last st and bind off.
Headband (white)
The head band is stitched across the top of Appa’s head
R1. ch 18, sc into 2 ch from hook, sc across (16), and 3 sc into last st
R2. Continue working into the other side of the ch and sc across (16 sts), 3 sc into the 17th st
R3. Continue on the other side and sc 17 sts around, 3 sc into the 18th sts
R4. sc around, sl st and leave a tail for joining
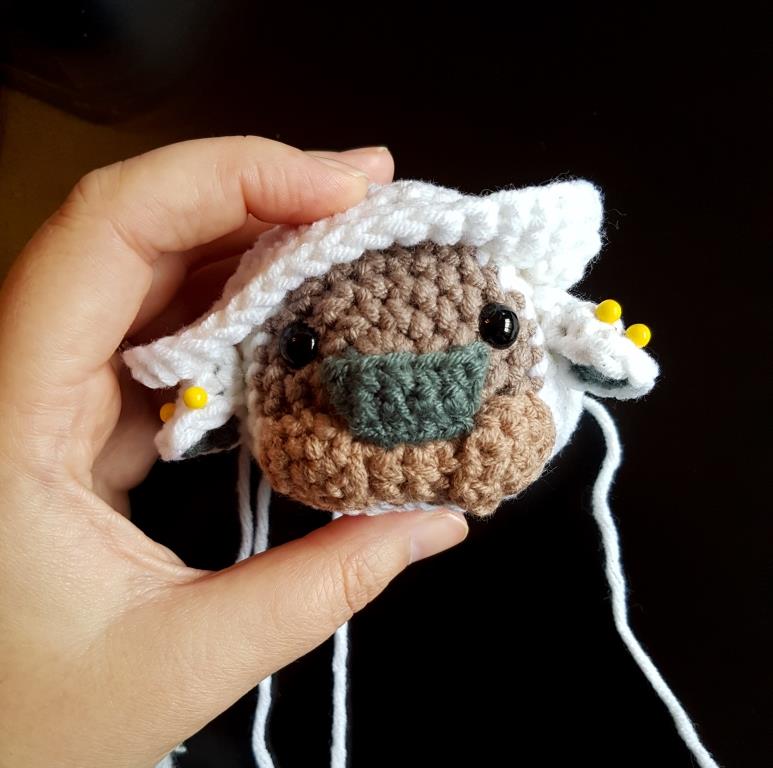
Pin the ears in place, then pin the headband over Appa’s forehead (covering the row where you did a color change from brown to white in the head). The ears need to be nicely tucked underneath the head band.
First stitch down the back of the headband and stop stitching approximately ½ cm from the edge of the head band. Then stitch the ears in place.
Then stitch the horns in place by tucking them underneath the back of flap the you left open when stitching the headband on. Once the horns and ears are in place, you can stitch down the 1cm flaps. Attach the head to the body (to the open end of the body).
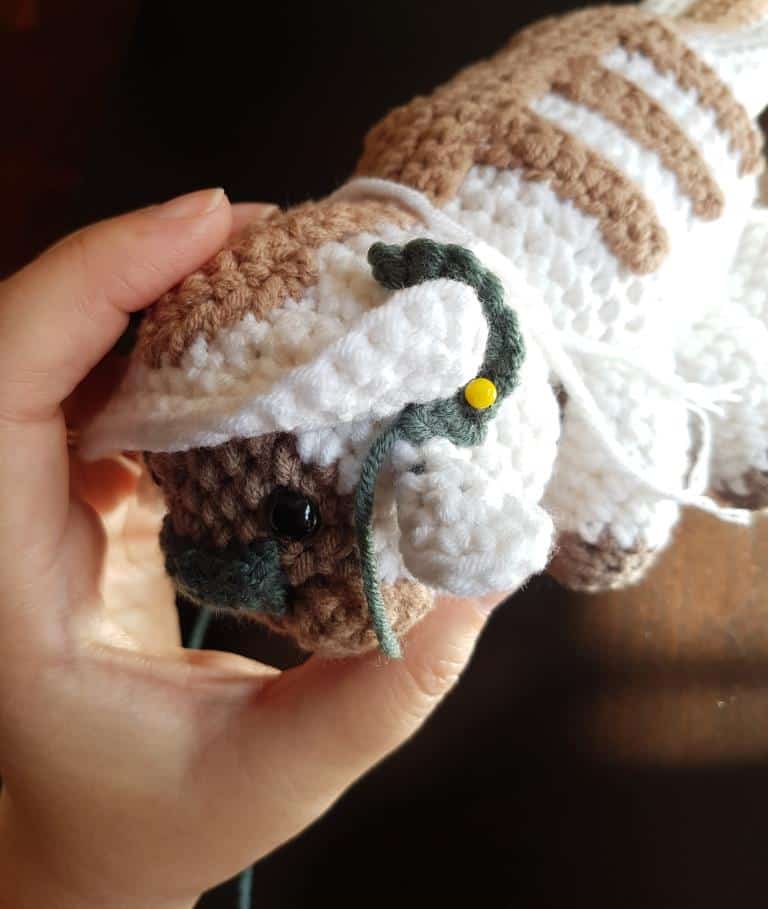
Legs (brown + white, x 6)
Rnd 1. start in brown, mr 6 sc (6)
Rnd 2. 2 sc in ea st (12)
Rnd 3. sc around into bl only (12)
Rnd 4 – 10. change to white and sc around (12)
Only stuff halfway, sl st and bind off, leaving a tail. Use the yarn tail to stitch the top of the leg closed. Attach the legs (3 on either side) evenly along the side of the body.
Back detail
The arrow running down Appa’s back is made up of several parts, namely a triangle which sits on his head, a long strip for the main part of the arrow, a series of small side strips and the tail base.
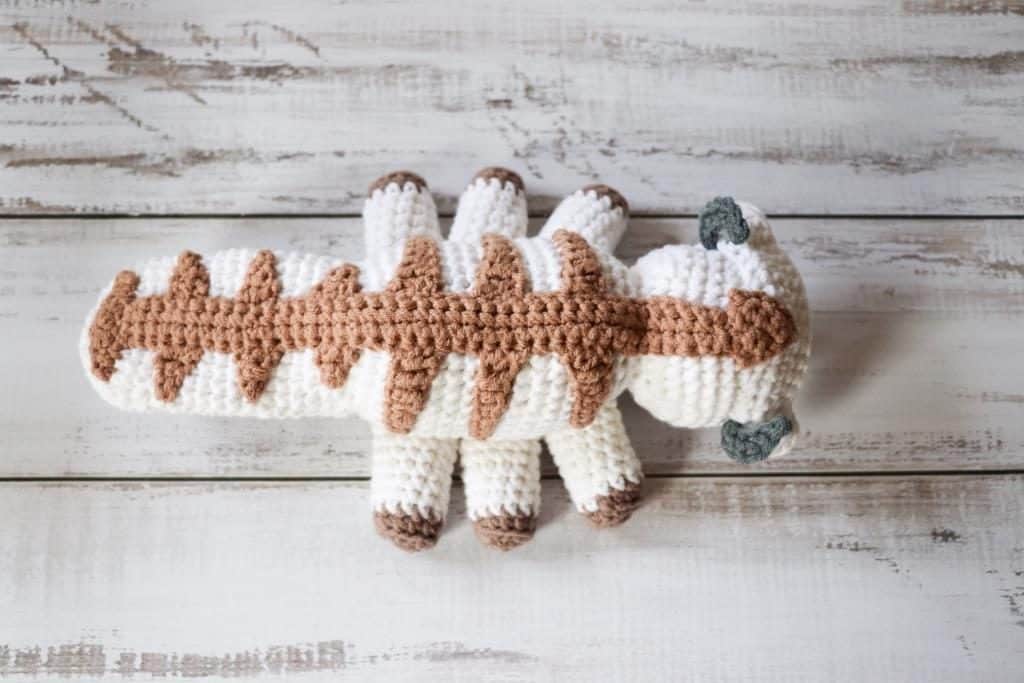
Triangle (tan)
R1. ch 2, sk1 and 2 sc into ch (2)
R2. ch 1, turn, sc into next st, 2 sc into last st (3)
R3. ch 1, turn, sc into next 2 sts, 2 sc into last st (4)
R4. ch 1, turn, sc into next 3 sts, 2 sc into last st (5)
R5. ch 1, turn, sc into next 4 sts, 2 sc into last st (6)
R6. ch 1, turn, sc into next 5 sts, 2 sc into last st (7)
Bind off and leave a tail for joining. Carefully pin the triangle in place on the head, overlapping onto the headband (I placed mine 2 rows back from the edge of the head band.) Stitch in place.
Centre stripe (tan)
R1. ch 40, sc into 2 ch from hook, sc to end (39)
R2. ch 1, turn, sc to end
R3. ch 1, turn, sc to end
Bind off and leave a long tail for joining. Attach the stripe down the centre of the body.
Side stripes (body, tan, x 12)
There are 6 pairs of side stripes. 3 larger pairs that are sewn onto the body, 1 small pair that is sewn at the join of the tail and body, and 2 medium sized pairs that are sewn onto the tail.
Side stripes (body, x 6)
ch 8, sl st into 2nd ch from hook, sc into next 3 sts, hdc into next st, 2 dc into last st.
Sl st and bind off. Attach to body centre stripe, and in line with the legs.
Side stripes (tail join, x 2)
ch 3, sc into 2nd ch from hook, dc into last ch. Bind off. Sew into place.
Side stripes (tail, x 4)
ch 4, sl st into 2nd ch from hook, sc in next, dc in last st. Bind off. Sew into place.
Tail base (tan)
ch 8, sl st into 2nd ch from hook, sc in next, dc in next 3 sts, sc in next st, sl st into last st. Bind off and sew into place at the base of the back stripe.
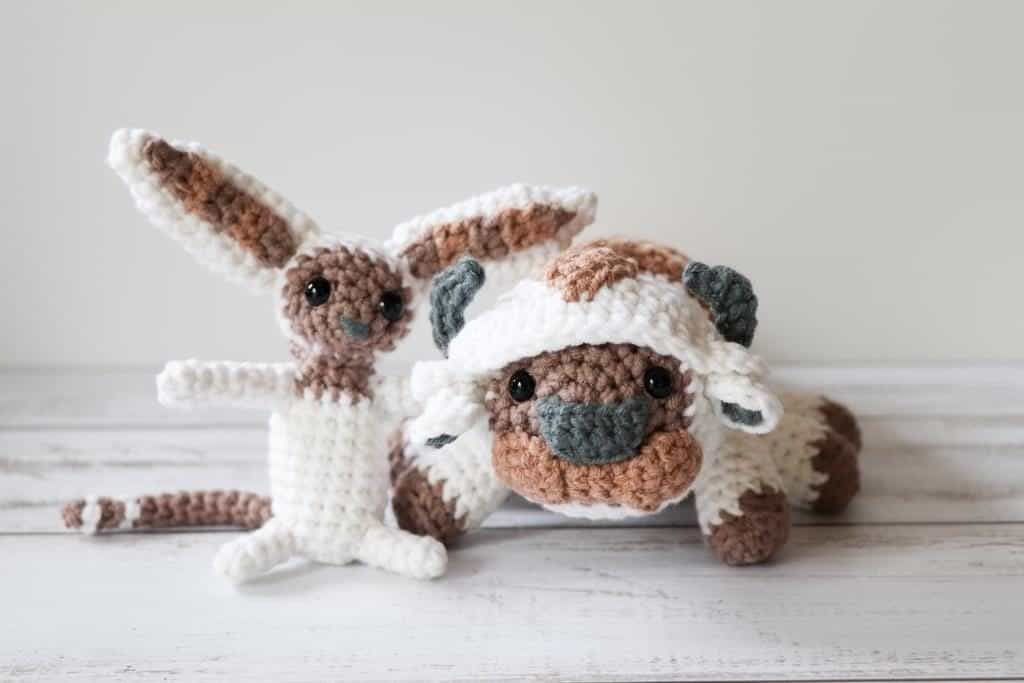
Looking to crochet Appa a little friend? Here is my free crochet Momo pattern!
Yours in craft,
Caitie x
Thoresby Cottage is a participant in the Amazon Services LLC Associates Program, an affiliate advertising program designed to provide a means for sites to earn advertising fees by advertising and linking to Amazon.com.

Thank you for sharing this! When doing the single crochets, are you going through both loops or the back loop only?
You work through both loops unless otherwise specified in the pattern 🙂
Amazing, thank you! That’s what I was doing and second guessed myself.
I really appreciate that you still reply to questions on here – very kind of you❤️
Hi
The pattern looks great and your instructions look lovely and clear! Do you have this in pdf format?
So glad you like the pattern! Unfortunately I don’t have it in PDF format at this time.
Have you by chance tried this pattern with bernat blanket yarn? I want to make a larger version thats super cuddly. I figured the pattern would transition to the size beautifully since it is so well written, but I was curious if you had tried it before. Thank you for sharing this pattern!!!
I haven’t tried it but I don’t see why it wouldn’t work! Appa would definitely be much bigger and super squishy 🙂
If I were to use worsted weight acrylic yarn, do you have a suggestion on hook size & eye size to accommodate for the thicker yarn? I’m new to this type of crocheting.
It’s best to check the yarn ball band for the recommended hook size. I would say go down one hook size from what is suggested on the ball band so that your stitches won’t have too many gaps. If you tend to crochet quite loosely then you may need to go down another hook size. The light worsted yarn I was using is on the bulkier side of light worsted, so you may find that you don’t even need to change up the hook size at all! As for the eyes, I like to have a few sizes on hand and then hold them in place to see which one I like best. If your Appa ends up being quite a bit bigger than the dimensions I have noted in the pattern, then you can go up an eye size too.
Hi! I wanted to try making Appa, but in more of a keychain size. Do you think this pattern would still work if I used a lighter weight yarn, or just half the threads of a weight 4 yarn? Thanks!
It absolutely will work! (it may just be a little fiddly in parts). I would suggest using a lighter weight yarn (sport or lace weight, or even embroidery thread…) rather than splitting the yarn. Splitting the yarn can make the yarn prone to breaking. Happy stitching!
Thank you, this helps. I haven’t gotten around to this project yet but here’s to trying!
hi, do you happen to have a video of you making Appa?
i want to make him for my friend, but i am a beginner crochet-er & i am very lost lol
Unfortunately I don’t have a video, but please do pop me an email if you have any questions and I’ll do my best to help!
Hello, I’m excited to get started on this! Is this written is US or UK crochet germs? Thanks!
This pattern is written using US crochet terms. Happy stitching!
Thanks! Also, what brand of yarn did you use?
I used Elle Pure Gold (a local brand) but any DK/light worsted acrylic yarn will give you the same look!
in your pattern i couldn’t find how many skeins you used? im looking to make one that’s preferably double sized to the dimensions you gave of your finished product, how would you recommend i resize your pattern
Hello, you need less than 1 skein of yarn per color (double knot / light worsted). If you work this pattern with a bulkier yarn and large crochet hook you will get a bigger Appa. It will have a slightly different (more squishy) look. Hope that helps!
Do you happen to have this pattern in a downloadable pdf because i would really love to sace it to my files to be able to use it if i have no internet or service and cant load the page with out having to screenshot it?
Unfortunately I don’t have a PDF version of this pattern at this time.