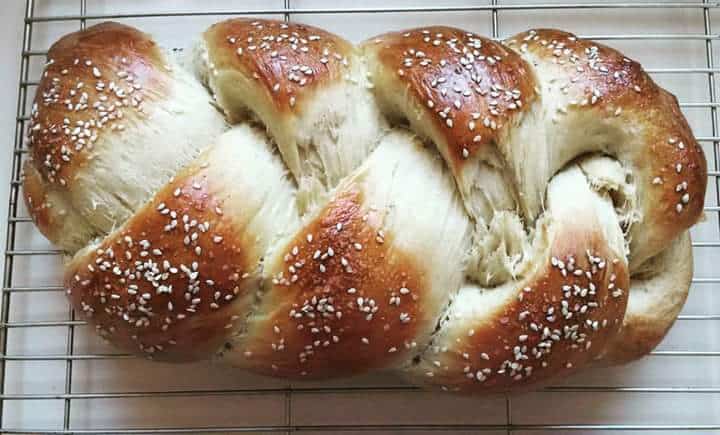
There is something so comforting about the smell of home made bread, but it can be quite an effort to make by hand and so I don’t often do it. However, now that I have a Thermomix, bread making is so much easier! It’s simply a matter of chucking in the ingredients and letting the machine do (most of) the rest.
The recipe I’m posting today is for a simple Thermomix braided bread loaf. This type of braided bread is also known as challah or kitke; and is a sweetened and enriched bread eaten on the Sabbath.
This bread recipe whips up really quickly and yields 1 large loaf. I made mine using the TM 5, but you could easily make it in the TM 31, a bread maker, or by hand. It is best eaten fresh on the day, but it’s a great loaf for sharing and I can guarantee that there won’t be any leftovers…

Braided Bread Recipe
Yield // 1 large loaf
Oven temperature // 150ºC
Ingredients
- 190 g lukewarm water
- 500 g flour
- 1 sachet dry yeast (approx 2 tsp)
- 50 g sugar (you could substitute with honey)
- 1 egg
- 1/2 TBSP salt
- 75 g olive oil
- egg wash (1 egg + 1 TBSP milk or water)
- sesame seeds, poppy seeds or kosher salt for sprinkling
Instructions:
- Add the water to the TM bowl followed by the flour
- Add all the remaining ingredients (yeast, sugar, egg, salt, oil) and mix for 10 seconds / speed 4
- Scrape down the sides and mix for a further 5 seconds / speed 4
- Set the Thermomix to knead for 2.5 minutes
- Turn the dough out into a bowl or onto a mat, cover it (either with a damp tea towel or plastic wrap with some oil brushed onto it so it won’t stick) and leave it to double in size (approximately 20 – 30 minutes)
- Divide the dough into 3, roll into logs and plait together. Feel free to do more complicated plaits if you know how! Make sure to tuck in the ends so that they don’t come loose while baking.
- Place the loaf on a baking tray, brush with the egg wash and sprinkle with seeds/salt
- Bake for about 20 -30 minutes, or until the top is golden brown and the loaf sounds hollow when tapped.
You might also enjoy
>>Vanilla poached guava recipe
>>Pot of Pickled Sweet Peppers Recipe

Did not get on well using this recipe/method unfortunately 🙁
First of all it would not rise, even after double the time stated. However, when cooking in the oven it tripled in size meaning you could not see it was a plait – it just looked like a messy loaf of bread.
Secondly, after the full amount of baking time it was still completely doughy in the middle.
The recipe needs a lot more clarification.
I also think a big problem was the recipe does not tell you to mix the yeast with warm water and leave for a couple of minutes before adding the other ingredients – this is a must with baking bread.
Sorry to hear that it didn’t work out for you! I’ve made this lots of times with great success. It sounds like the loaf did not proof at a good temperature to start with (which is why it ballooned in the oven). You need to proof at a temperature of 25°C or more to get a good rise, and make sure that it has properly proved before placing in the oven. The poor proving will also affect the bake, which may be why it did not bake all the way through. It is also important to remember that everyone’s ovens vary with how they cook (note too that this recipe is not for a convection oven!) and it is important to test the bread to see if it is cooked. The good old “knock to see if it sounds hollow” test works well here. As for yeast, if you are using fast acting dry yeast, you do not need to mix it with water to activate the yeast – best to check the instructions on the package to make sure. I hope these tips will help with successful future loaves! I’ll update this post too to include the tips I’ve noted here.