How to crochet the magic ring (also known as the adjustable loop or magic circle) is one of those “crochet moves” that if you’ve mastered it, you probably use it all the time. But if you haven’t, it can seem really fiddly and intimidating.
Once you have learned how to crochet the magic ring you will see how absolutely essential it is for crocheting in the round and crocheting amigurumi.
Magic ring vs slip knot
One question you may be asking is why can’t one use a slip knot, or a series of chains formed into a loop and just work the crochet stitches directly into that? Those methods of making a ring are perfectly adequate and certainly have their place (such as in the Starburst granny square pattern)
However, if you use those methods, you’ll end up with a hole in the centre of your work that cannot be tightened. If you are making granny squares, that’s not a problem. But if you are making a soft toy that needs to be stuffed, you really don’t want a hole where all the stuffing will poke through.
The beauty of the magic ring is that you can work as many or as few stitches as you like into the ring and still cinch the ring completely (or almost completely) closed.
How to crochet the magic ring detailed tutorial
Detailed pictures and step-by-step tutorial below!
How to crochet the magic ring step by step
The magic ring is worked in two stages. First, the foundation ring / loop, followed by whatever stitches your pattern calls for. There are lots of different ways to do the magic ring, but I find this the most comfortable as you can easily adjust the tension of your yarn to match your crochet style.
STEP 1: Loop the end of your yarn over the back of your forefinger
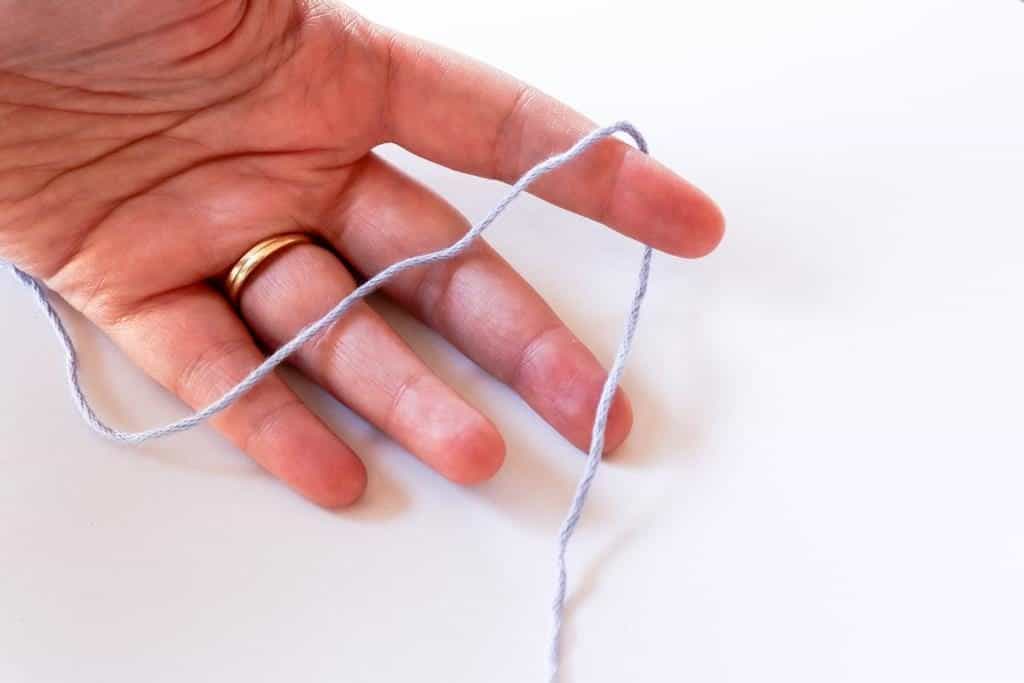
STEP 2: Wrap the loose end around your finger to form an open loop. I like to hold the leading thread (i.e. not the loose end) with my other fingers so that the loop remains snug around my forefinger. If it’s too loose it might slip off.
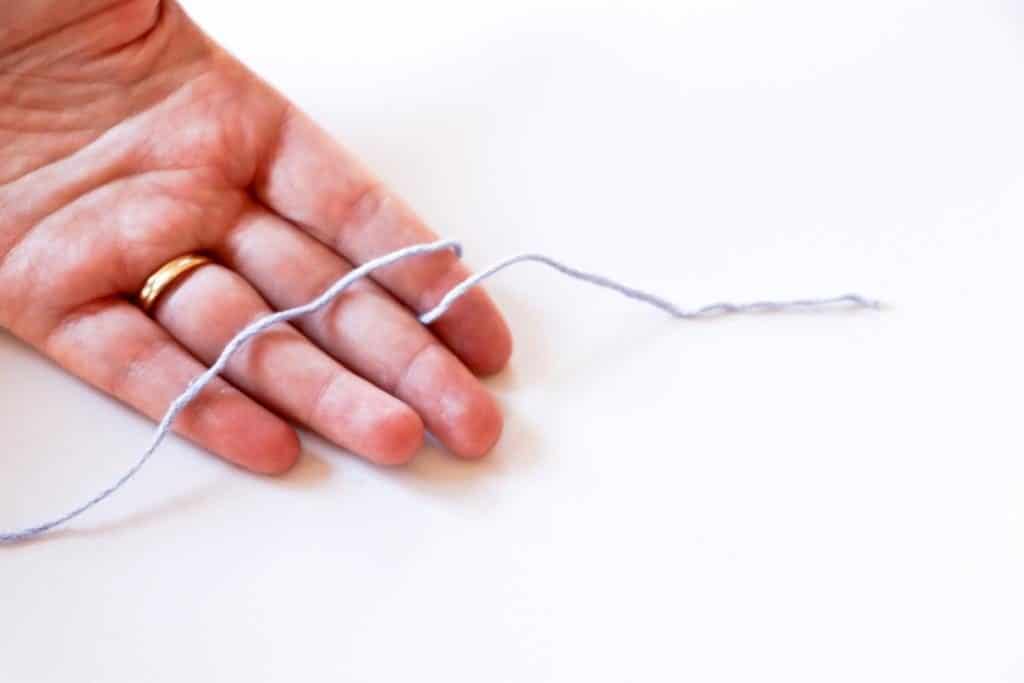
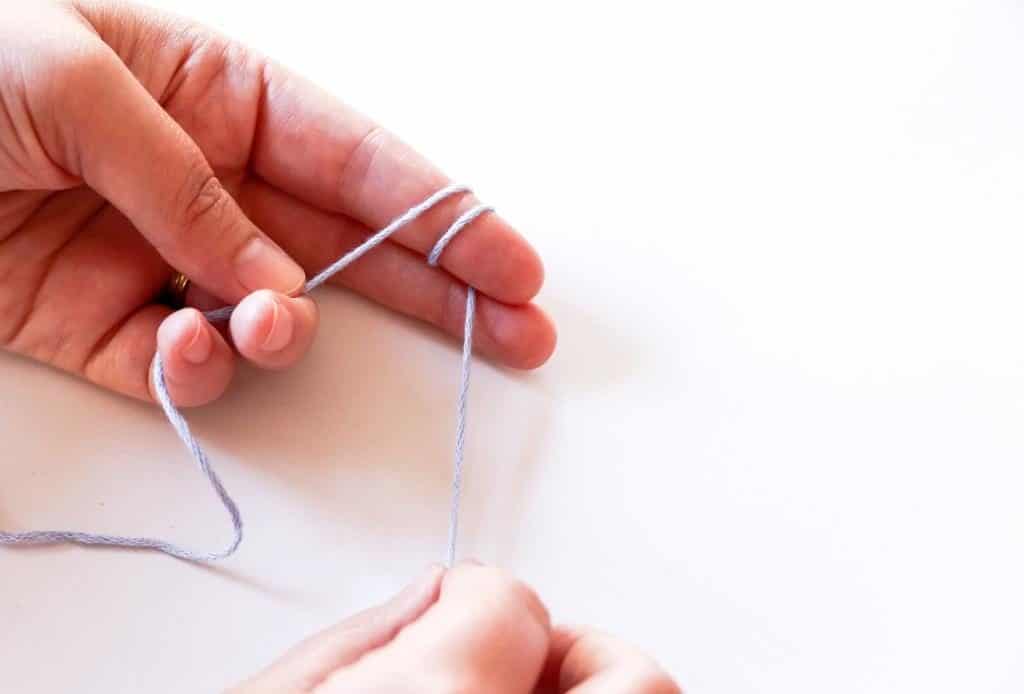
STEP 3: Insert your hook under the loop on your finger and pull the leading yarn through
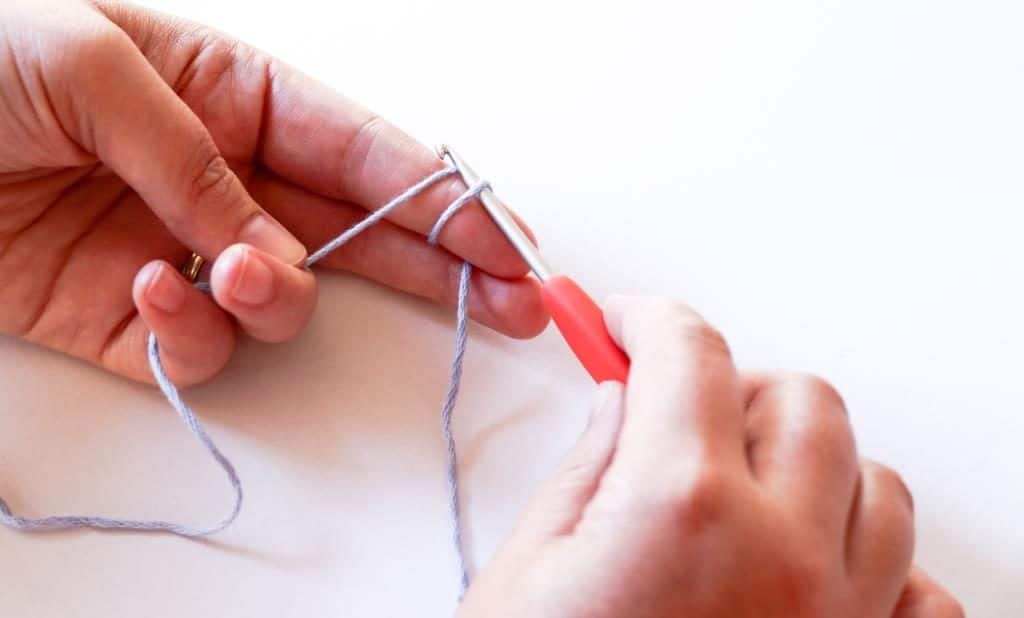
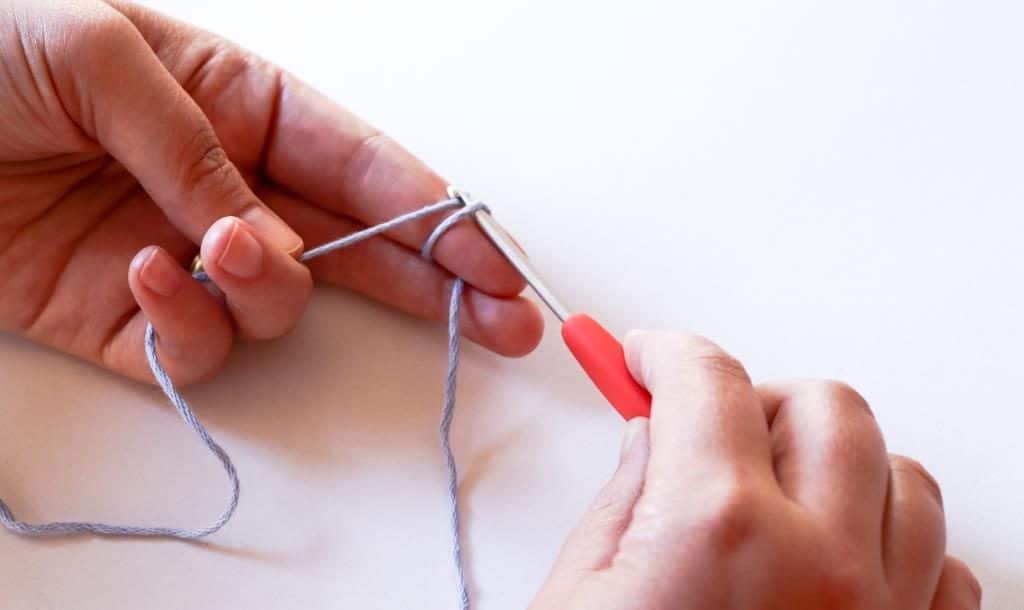
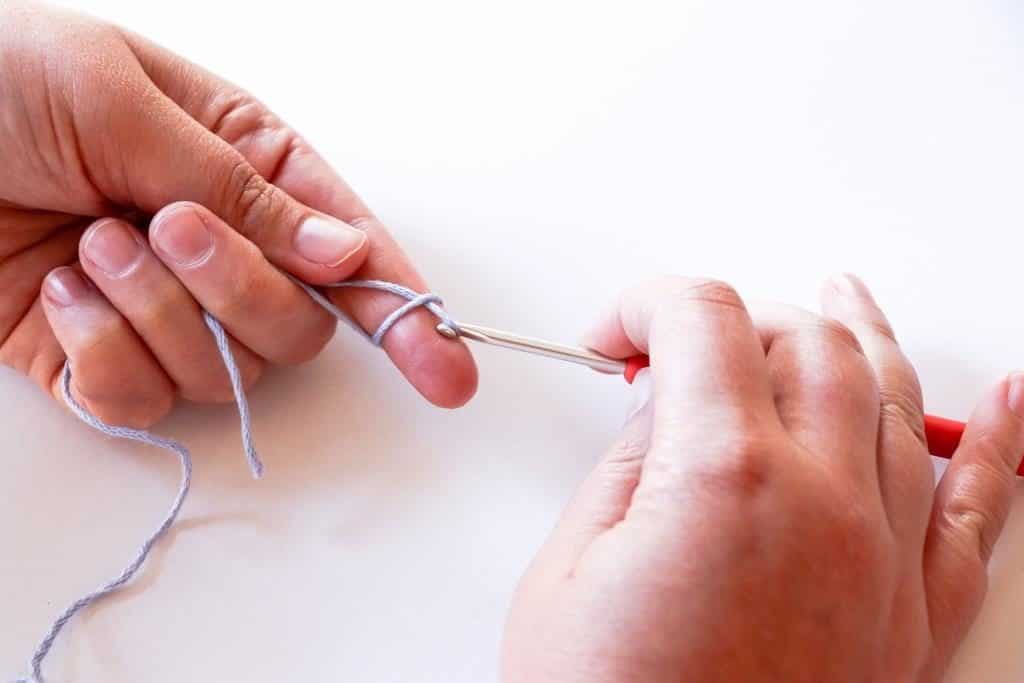
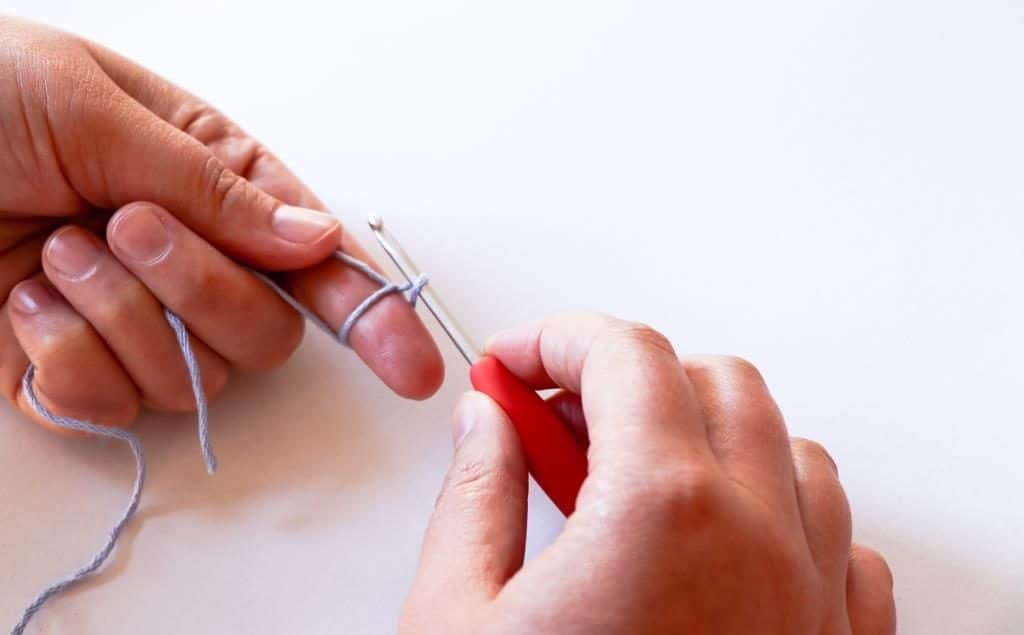
STEP 4: Yarn over and pull the yarn through the loop on your hook. Congratulations! You have made a magic ring! You are now ready to work any stitches into the ring. Once you have completed the set of stitches into the ring, pull the loose end to cinch your magic ring together.
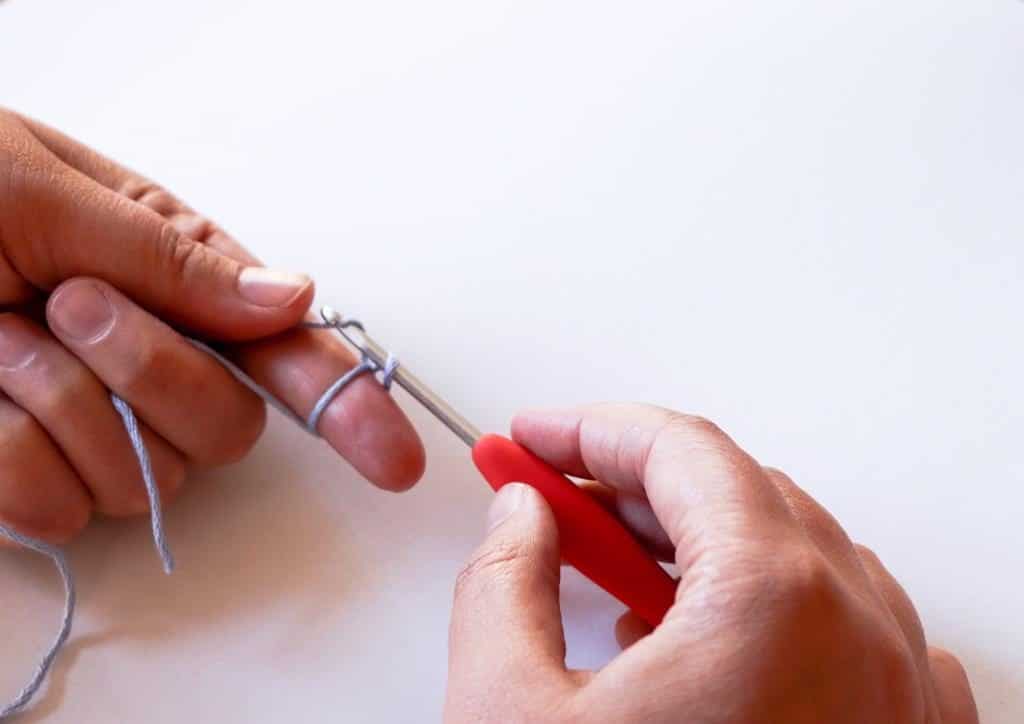

As I said, there are lots of methods for how to crochet the magic ring. I like to loop my yarn over my finger so that I have good control of it (I find my stitches tend to slip all over the place otherwise). However, if you find it too fiddly holding all the bits of yarn as I’ve shown in the pictures above, then simply lay your yarn flat and follow the same set of instructions for the placement of your yarn. Don’t worry if it all seems a bit floppy – you can tighten the ring at any time simply by pulling on the yarn tail. That’s the beauty of the magic ring!
Ready to put your new skills to the test? Here are some free patterns for you to try out.
>>Bunny ears egg cosy
>>Carrot top egg cosy
>>Christmas wreath decoration
>>Crochet toy basket
Yours in craft,
Caitie x
More crochet tutorials
>>How to crochet front and back post double crochet (FPdc + BPdc)
>>How to wet block crochet squares

I’m late to the party, but I found this to be very useful. Thanks for having pictures and words, I have trouble learning new stitches from youtube because they go too fast.
I forgot how to do the magic ring. the instructions were so easy. nicely explained. i won’t forget how to do the magic ring.
thanks!!!
Thanks, very helpful
thank you sooo much for these instructions, all the other sites that I had found were so confusing and made no sense at all, this was so helpful, and i hope you have a wonderful day!
I’m so glad that you found the tutorial helpful! Happy stitching 🙂